How to set up your Guitar perfectly in 5 Steps
The perfect guitar setup is still a mystery for many guitarists. But a few simple steps are often all it takes to improve the sound of your instrument or make it easier to play. Whether it’s buzzing strings, out-of-tune chords or scratchy pots – a bad guitar setup can quickly spoil the fun. We’ll show you how to set up your guitar perfectly in 5 steps. 🎸👌
IMPORTANT: There’s no shame in feeling unsure about what to do or questioning your own abilities! It can also happen that something you try doesn’t deliver the desired results. In these cases, it’s best to consult a specialist (e.g. our guitar department), who will be happy to help and provide assistance. Follow this link to our Guitar Workshop if you need our help.
How to set up your Guitar: Step 1 – Curvature of the Neck
The correct neck curvature is essential for adjusting the string action and should always be checked first. All electric and most steel-string acoustic guitars have a metal rod embedded in the neck to counteract the tension of the strings. This truss rod (also known as a neck tension rod) can be adjusted using a screw at the headstock or where the neck meets the body.
If the truss rod is too loose, the neck is bent forwards (away from you) due to the string tension, which results in a higher string action. When you tighten the truss rod, the neck is bent backwards (towards you), moving the strings closer to the fingerboard. A poorly adjusted neck can therefore lead to buzzing and rattling of the strings or an uncomfortably high string action. Always adjust the truss rod in small increments (quarter turn) and never with force – easy does it! You should also give the wood some time to settle after each turn.
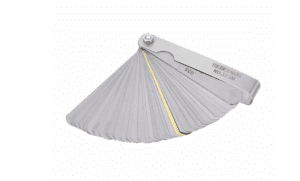
Harley Benton Feeler Gauges
Turning to the right (clockwise) tightens the truss rod (“righty tighty”) and moves the strings closer to the fingerboard.
Turning to the left (counter-clockwise) loosens the truss rod (“lefty loosey”) and raises the string action.
The easiest way to determine the perfect neck curvature is to use the low E string as a guide. To do this, press onto the string in the first and last frets and examine the region around the 8th/9th fret. Ideally, there should be a small gap (0.2 – 0.5 mm) between the string and the top of those frets. If you want to be extra precise, you can measure this using a feeler gauge or a special ruler.

Harley Benton Notched Straightedge Guitar
How to set up your Guitar: Step 2 – String Action
The string action refers to the distance between the bottom of the string and the top of the fret and plays a vital role in the feel and correct intonation of your instrument. Simply speaking, the string action can be adjusted at both ends of the string, i.e. at the nut and bridge.
The nut is a sensitive part of your instrument and can only be altered by working on the material itself using a file. Unless you’re an expert in setting up your guitar, it’s best to leave this to a specialist. A well-adjusted nut usually only needs to be reworked after the frets have been adjusted or replaced. The height of the bridge, on the other hand, is easy to adjust on any electric guitar. Many instruments even allow for adjusting it individually for each string.
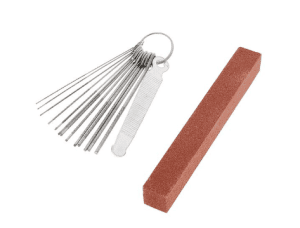
Harley Benton Nut File Set
The perfect string action is always a matter of personal preference. A high action requires a little more pressure and skill, but helps to prevent buzzing. A low action, on the other hand, feels more comfortable, but can lead to rattling or certain notes no longer decaying properly. The string action is measured from the top of the fret to the bottom of the string at the 12th fret. Most electric guitarists prefer a gap of 1.5 – 2.5 mm for the low E string and 1.0 – 2.0 mm for the high E string. For acoustic guitars, add 1.0 mm to these values as a rule of thumb.

Harley Benton Parts String Action Gauge
How to set up your Guitar: Step 3 – Perfect Octaves
The length of the string is also important for the perfect guitar setup, namely when it comes to getting octaves in tune. At the 12th fret, where the string is halved, you should ideally hear a perfect octave above the open string. In reality, however, pressing down on the string slightly stretches it, which can negatively affect the intonation in the high registers.
To guarantee perfect octaves, compare the open string (or even better: the harmonic in the 12th fret) with the actual pitch at the 12th fret. You can trust your ears or use a tuner for this. Most bridges have individually adjustable string riders for adjusting the string length. Others can be moved in pairs or as a whole.

Thomann CTC-50 Black
If the fretted pitch is too high compared to the open string/harmonic, move the string rider backwards to lengthen the string. If it is too low, shorten the string by moving the rider forwards. And don’t forget to retune the open string after every adjustment!
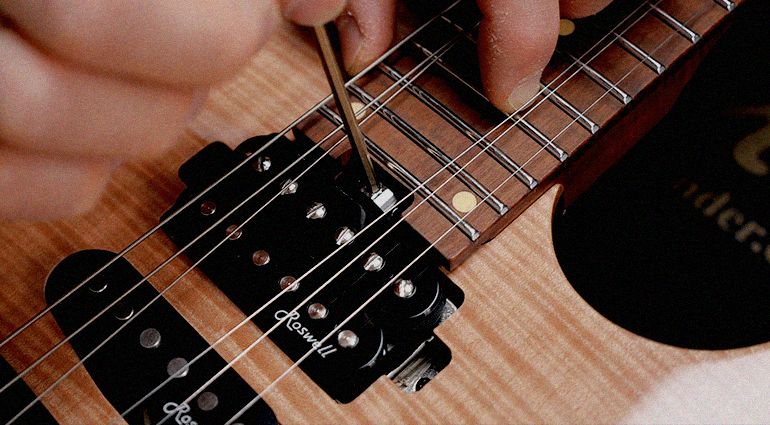
How to set up your Guitar: Step 4 – Pickup Height
Once you’ve set up your guitar perfectly, you should take some time to readjust the height of the pickups. That’s because every time you change the string action, the distance between the pickup and the string also changes. As a rule of thumb, too much of a gap will make the pickup sound thin and weak. On the other hand, a pickup that’s too close to the strings can sound muffled and lifeless. In addition, if the pickups are set extremely high, their magnetic field can affect the vibration of the strings.

Harley Benton Guitar & Bass Toolkit
Most guitars leave the factory with the pickups about 2.5 – 3.5 mm away from the strings. However, larger gaps of up to 5 mm are also possible and can result in a clearer and more dynamic tone. The best way is to press down the strings at the last fret in order to adjust the pickup height properly. Some pickups also let you make individual adjustments for each string. Generally speaking, there’s no “right” or “wrong” here and apart from a screwdriver, no other tools are required. Just experiment to find out what works best for you ¬– and always remember how many turns you have made so that you can return to the starting position if in doubt.
How to set up your Guitar: Step 5 – Maintenance and Care
The last step to the perfect guitar setup is to give your instrument the care and maintenance it deserves. Nothing is more annoying than scratchy pots, wobbly jacks, or loose tuning machines. Basically, you should regularly check and tighten every screw on your instrument before it becomes too loose. Pay special attention to the pots and the jack. If they’re loose, the internal wiring can easily be damaged, which often renders the guitar unusable.

Thomann Polishing Cloth Grey
As far as maintenance is concerned, you can extend the life of pots and selector switches by cleaning them regularly with contact spray. For the surfaces of the body and fingerboard, various polishes and cleaning agents are available that will give your instrument a new shine.

Dunlop Formula 65 Polish

Dunlop Lemon Oil
Video Tutorials: Guitar Setup
Note: The videos are all in English, but YouTube translation with subtitles works very well.
You are currently viewing a placeholder content from Youtube. To access the actual content, click the button below. Please note that doing so will share data with third-party providers.
You are currently viewing a placeholder content from Youtube. To access the actual content, click the button below. Please note that doing so will share data with third-party providers.
You are currently viewing a placeholder content from Youtube. To access the actual content, click the button below. Please note that doing so will share data with third-party providers.
You are currently viewing a placeholder content from Youtube. To access the actual content, click the button below. Please note that doing so will share data with third-party providers.
You are currently viewing a placeholder content from Youtube. To access the actual content, click the button below. Please note that doing so will share data with third-party providers.
You are currently viewing a placeholder content from Youtube. To access the actual content, click the button below. Please note that doing so will share data with third-party providers.
You are currently viewing a placeholder content from Youtube. To access the actual content, click the button below. Please note that doing so will share data with third-party providers.
You are currently viewing a placeholder content from Youtube. To access the actual content, click the button below. Please note that doing so will share data with third-party providers.
The perfect Guitar Setup in 5 Steps: Your Feedback
Do you have your own tips and tricks for the perfect guitar setup? Let us know in the comments.


You are currently viewing a placeholder content from Facebook. To access the actual content, click the button below. Please note that doing so will share data with third-party providers.
More InformationYou are currently viewing a placeholder content from Instagram. To access the actual content, click the button below. Please note that doing so will share data with third-party providers.
More InformationYou are currently viewing a placeholder content from X. To access the actual content, click the button below. Please note that doing so will share data with third-party providers.
More Information