

Changing your guitar or bass strings is a process that can seem daunting to a lot of players! But it’s a crucial step to ensure that your instrument will play right, sound right, and that for a long time. Tuning stability, action and intonation are direct consequences of your string-change technique, so make sure you get it right and treat your instrument! 👇
You are currently viewing a placeholder content from YouTube. To access the actual content, click the button below. Please note that doing so will share data with third-party providers.
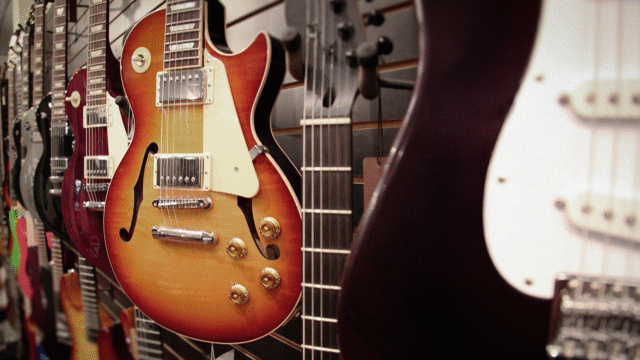
How to change your strings – The right way!

How to change your strings: Preparation
As is for most things, preparation is key! Changing your strings is going to require a few essential tools and a clean working surface. So the first step should be to find a clean table to work on. Lay down a towel or a professional mat such as this Harley Benton GuitarTech Service Station or a more affordable neck rest in order to safely put your instrument down and work on it without risking to scratch the back of it.

Now that your instrument is in position, you can start laying down the tools that you’ll need to perform the string change, and a bit of TLC.
Before you do that however, it might be useful to take a break at this stage to take some measurements! Even more so if this is your first string change, you have to keep in mind that moving parts… well, they move, and things might not be in the same spot once you’re done changing the strings!
So grab a ruler (references below) and check your string height at the 12th fret, the height of your bridge saddles and their distance to the edge of the bridge. That way if anything was to move during the cleaning and string change process, you’ll know exactly how to set it back to where it was!
How to change your strings: Tools
You need very few tools to change your guitar or bass strings. You can actually get away with none if you really wanted to, but a few basic ones with guarantee to make that process a whole lot easier!
A string winder and a pair of string cutters are the two that come to mind, and you’ll find them in most guitar and bass tool kits, such as this Harley Benton or GrooveTech
-

- GrooveTech Tools Guitar Player Tech Kit
-

- Harley Benton Guitar & Bass Toolkit
The string winder will allow you to unwind and rewind strings much faster and the wire cutters will allow you to cut the used stings halfway, in order to pull out both sides without having to battle an old twisty end through the bridge of your instrument, risking to damage it.
The various gauges and rulers included, as well as a handy screwdriver, will help you through the setup process once your new strings are in place, but we’ll get back to that soon!
Keep in mind that if you’re working on a bass, you’ll need to adapt the size of the string winder to the larger machine heads of that instrument! Look at this Dunlop Bass Kit for example!
You are currently viewing a placeholder content from YouTube. To access the actual content, click the button below. Please note that doing so will share data with third-party providers.
How to change your strings: TLC products
With your old strings now off the instrument, there is no better time to give your guitar or bass some love! Having access to the fretboard, frets and areas otherwise hardly reachable with strings on, a few cleaning products and accessories will come handy to give your instrument a bit of a spa day!
Frets are a fundamental element of how your instrument will play and sound, so take the time to clean them up and make them shiny while the strings are of! One of these rubber kits as well as a fretboard guard (to protect the wood around the fret while you polish them) will leave your frets shiny and leveled!
-

- Göldo WS045 Fretboard Guard
-

- Hosco H-FPR-Set Polishing Rubbers
Finally once the dirty work is done, get yourself one of those Dunlop products kit in order to clean and condition your fretboard, as well as polish and/or wax your instrument finish.

How to change your strings: Out with the old, in with the new!
Now that your instrument is all clean and shiny, it is finally time to put the new strings on! Grab your favourite set of strings here and you’re ready to install them. Now keep in mind that the technique needed to change your strings will vary depending in the instrument you’re working on, so to make it extra easy, we’ve included all the videos you need in this article! Kris and his Guitar Tech Tips series are an absolute gold mine of information, tips, and best practices when it comes to setting up your instrument!
If you’re changing strings on an electric guitar or bass, scroll up 👆
If you’re changing strings on an acoustic guitar or special bridge instrument, scroll down 👇
You are currently viewing a placeholder content from YouTube. To access the actual content, click the button below. Please note that doing so will share data with third-party providers.
You are currently viewing a placeholder content from YouTube. To access the actual content, click the button below. Please note that doing so will share data with third-party providers.
How to change your strings: Setup
That’s it! Your instrument is clean, fresh strings are on, and you’re almost ready to go! Now remember when we told you to take some measurements in step one? Thought we forgot about that uh? 😄 Well now is the time to double check those with your new strings!
It’s very likely that your saddles have moved during the cleaning process, so while you tune your guitar or bass, check on those measurements you took in the beginning, and make sure the instrument sounds and plays the same way you like. And if you decided to go for a different string gauge, or that you want to raise or lower the action, you still have a good starting point to adjust action and intonation to your liking!


Comments 0
No comments yet.