Studio Monitors: 5 tricks for optimal placement

Studio Monitor placement: 5 tricks! Studio monitors are the crux of any recording studio, whether you’re using the spare room at home or tracking in a professional environment. Getting your monitors in the right position is key to ensuring consistent results from your mixes, so where should your studio monitors be placed? Is there anything else to consider when optimizing your room? And why does it matter? Read on to find out.
1. Studio Monitor placement: equilateral triangle setup
First thing to remember, position the monitors and your listening position (often the mixing desk) to form an equilateral triangle.

Placing studio monitors in an equilateral triangle setup refers to positioning the left and right speakers so that they are equidistant from each other and the listener, forming an equal-sided triangle.
2. Studio monitor placement: Is this really important?
Additionally, here’s why you should place correctly your studio monitors :
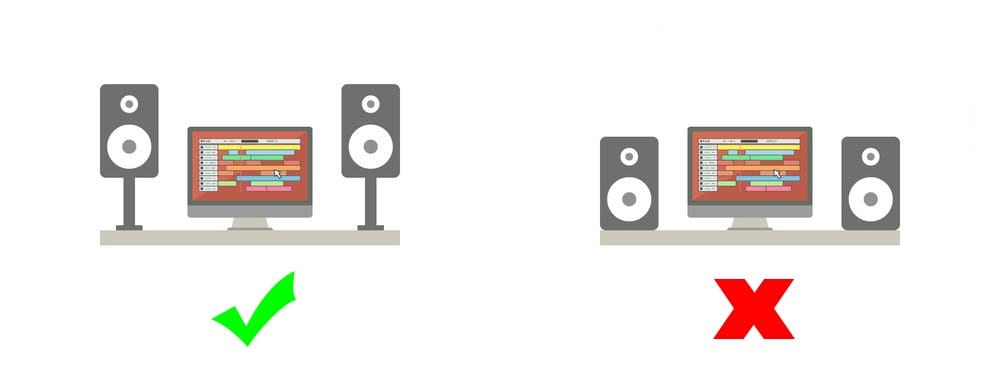
- Stereo Imaging: First, an equilateral triangle setup helps create an accurate stereo image. When speakers are placed at an equal distance from the listener, it assists in achieving a balanced soundstage where the left and right channels present a clear and precise stereo image. If your speakers are too far apart you’ll lose the ability to judge those important mix sounds that are usually placed in the centre of the stereo image, like your kick, snare, and lead vocals. Moreover, too close together and you won’t get an accurate feel of the width for hard-panned sounds like electric guitars.
- Sweet Spot Optimization: Secondly, it establishes an optimal “sweet spot” for monitoring. The listener’s position at the apex of the triangle allows them to experience the most accurate representation of the audio being played, minimizing phase issues and discrepancies in frequency response.
Moreover, you can find special desks designed for studio purposes to help you achieving this equilateral triangle setup. This one, for example, has 2 special elevated platforms for monitors to accommodate monitoring speakers.
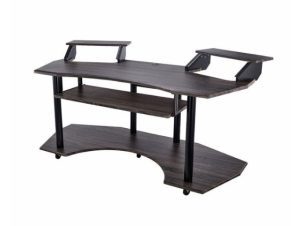
Millenium SD-180 B StudioDesk
3. Ear Level Height
Let’s go on with another crucial point. Place the monitors at ear level or slightly above. This helps direct the sound accurately towards your ears, reducing unwanted reflections from surfaces.
If your desk is a bit high or too low for your speakers, you can consider using height adjustable monitor stands. This is the ultimate option if you want to be able to adjust everything in your configuration.
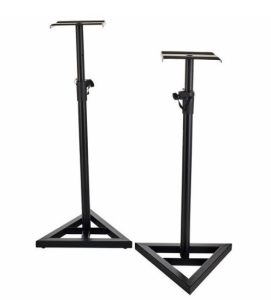
Height adjustable monitor stands : Millenium BS-500 Set
Remember, if your workspace is small and you can’t put monitoring speakers on your desk, consider this before buying a new one!
4. Away from Walls… Or close?
monitor placement by Genelec
Avoid placing monitors directly against walls or corners. We know that this is sometimes tough because of the lack of space of our home-studios. But you definitely should consider it to avoid these issue.
- Acoustic Resonance: Placing a monitor in the corner can lead to a buildup of low-frequency energy. This is due to the reinforcement of bass frequencies caused by the proximity of the walls.
- Uneven Frequency Response: Corner placement can cause uneven frequency distribution. Mid and high frequencies may be less affected, but the low frequencies can become boomy or overpowering due to the way soundwaves interact in corners, leading to an inaccurate representation of your audio.
- Imbalanced Stereo Imaging: It may cause a skewed stereo image, where one side seems louder or imbalanced compared to the other.
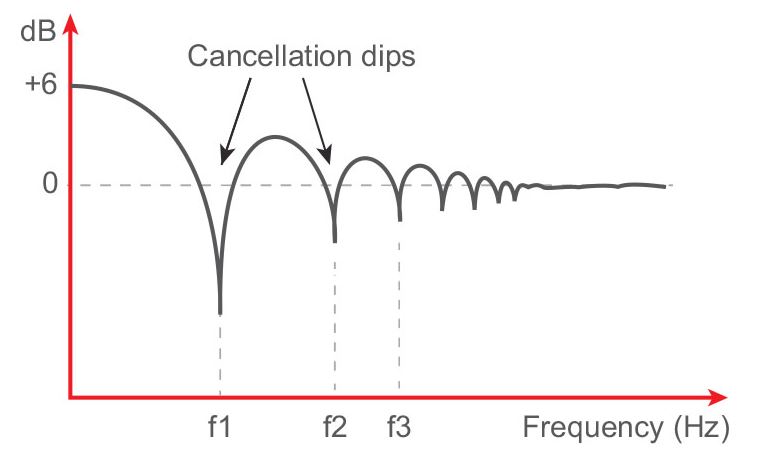
- Reflections and Phase Issues: Corner placement can increase the likelihood of sound reflections and phase cancellation, especially in the low-frequency range. These issues can interfere with the clarity and accuracy of what you’re hearing, impacting your ability to make precise mixing and mastering decisions.

Cancellation dips caused by a bad placement (Genelec)
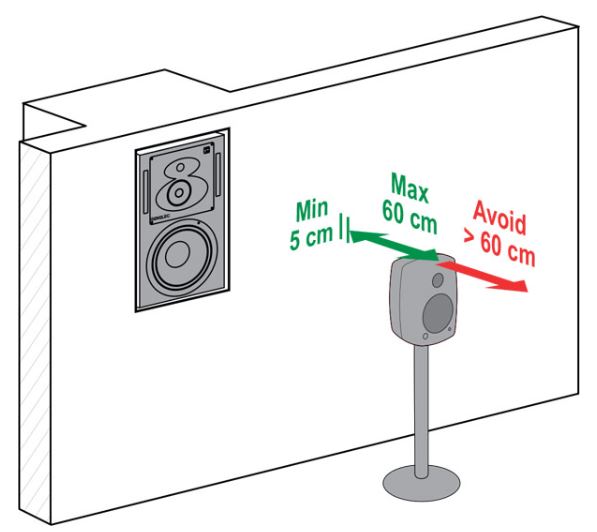
Although… We don’t all have 30m² space in our home-studio, right? A home-studio desk can eat a lot of space. For that reason, it can be tough, or almost impossible to place your studio monitors meters away from walls. In that case, we propose 2 solutions :
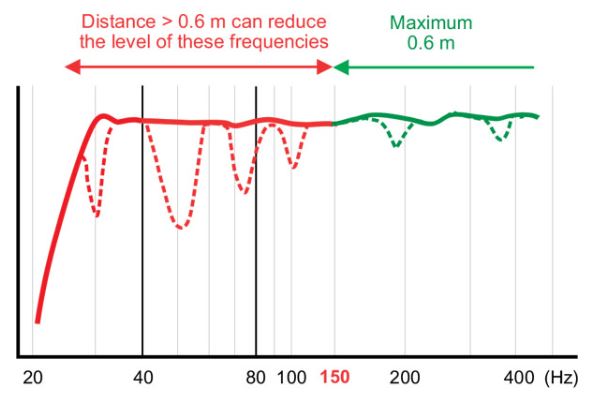
- Put your monitors between 5 and 60cm from walls. Doing this will avoid the worst opposite waves and sound cancellation.

Monitor placement by Genelec
- Try to put absorbers on the surface behind the monitors. This is not as ideal as having the right placement. Although, it can trap some reflections. Remember also that the thicker the foam is, the more it is theoretically capable of absorbing.
Too much windows? Try acoustic curtains 👍

Stairville Sound Absorber Pro 500g/m² Bk
Walls too resonant? Try thick foams or acoustic panels
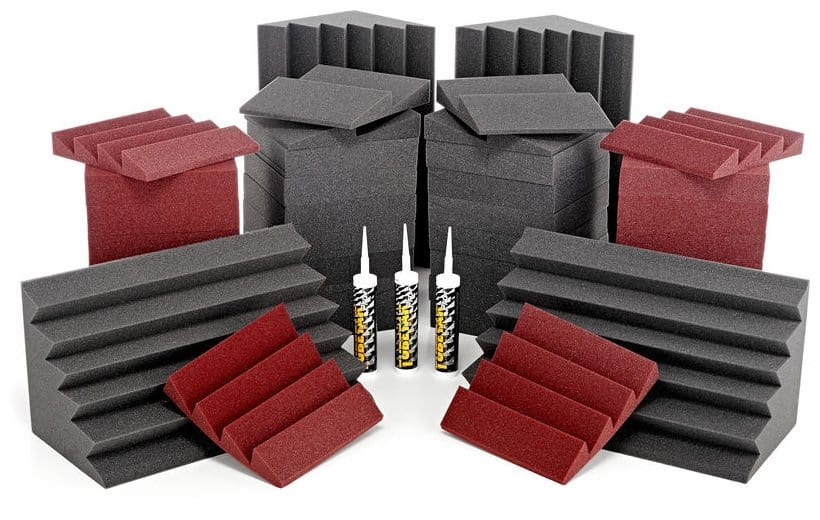
Auralex Acoustics Roominators Alpha-DST Burgundy
For corners, try bass traps
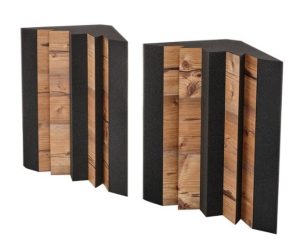
t.akustik Highline CBT1 Silver Spruce
5. Kill every acoustic issue : “Do Not” guide
These are small things that we don’t always consider, when we get the right placement, and the right height.

- Do not place the monitors directly on the desk. This occurs unwanted vibrations.
- Do not put anything between you and the monitors.
- Avoid placing your speakers near a window.
- Keep your phone, alimentation cables, internet box away from your speakers.
- Do not hang an acoustic guitar or any other instrument with a resonant body on the wall, even if it looks very nice.
With this advice you can be sure to kill the most of your sound issues!
More importantly, be sure to choose great monitoring speakers. Here’s a guide to help you out👇
You are currently viewing a placeholder content from Youtube. To access the actual content, click the button below. Please note that doing so will share data with third-party providers.
What did you think of this advice? Tell us what you would add to our “do not guide” in the comments!


10 comments
Leave a Reply
You are currently viewing a placeholder content from Facebook. To access the actual content, click the button below. Please note that doing so will share data with third-party providers.
More InformationYou are currently viewing a placeholder content from Instagram. To access the actual content, click the button below. Please note that doing so will share data with third-party providers.
More InformationYou are currently viewing a placeholder content from X. To access the actual content, click the button below. Please note that doing so will share data with third-party providers.
More Information
Max hodges says:
Centre of the room
Presents a bloody huge LF null spot in most rooms …. … so errr wrong ..,, diagram of equilateral arrangement , also wrong , on axis crossing point should typically be about 8-10 inches behind the back of your head . … not the front of your head . Or the middle of you head , because your ears are not a single point in space , for them to be on axis , the intersect must be behind you , diagram of speaker mounting implies speakers on stands that are also on the desk are the correct solution. No , they’re not . Fully independent stands with no physical connection to the desk are the correct solution . , EQ should not be applied to rectify room response for several reasons . Aside from the fundamental question of time domain validity , which is of itself rather important , there’s the more prosaic one of level and system headroom … uncorrected , untreated rooms can easily have null and peak variances of 40dB or more… If you try applying 40dB of a high Q boost to try and cancel out for a deep cancellation in the room mode response , all you will do is run out of headroom and likely damage something in the process . . There’s more fundamental errors but I really don’t care enough to completely rewrite the article for free
Abdul azeez says:
Good
Paul Graves says:
Thanks for sharing this useful information. I have learned many things about Studio monitors and how to place correctly. Thank you!
John Cinmons says:
Very useful information about the studio monitors. I have learned many things about Studio monitors and how to place correctly. Thank you for sharing this informative blog.
Daniel H. says:
The stereo vertex position (the point where speakers are aimed behind your head) is exactly 1′-2″ (or 14″) from the listening position (ear line). This means the stereo vertex position point is 10″ behind the back of your head since the average radius of the human head is close to 4″.
Tim says:
I am just reading post above from Max hodges.
Max…. you could made all of your points without the hostility. You sound very knowledgable, however, the one point that will be remembered, above all others, from your reply is that you are a bit of an arse. Don’t be an arse.
Good luck
Mr. Huge says:
Tim. You come across as a cuck. Don’t be such a cuck!
deepak tejwani says:
This article helped me a to understand lot of things about the studio monitor and speaker which comes under my budget and also get lot of information about monitors and speakers.. thanks a lot
Antonio Alexandre Rodrigues dos Santos says:
In addition to all this, I think we should listen, with the volume low and not too loud.
Peter says:
Until you have a professionally treated studio, I recommend placing your monitors as close to your head as possible. This allows you to listen with a low volume while reducing the influence of your surroundings.