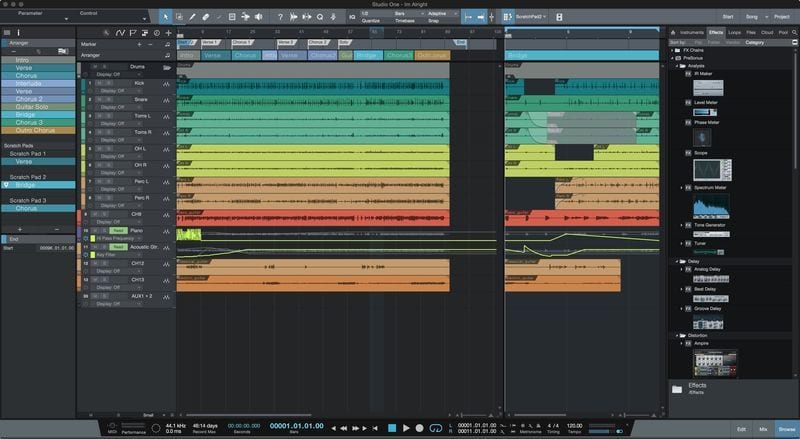
You have just recorded your first song. The bass is kicking, the guitars are loud and the singer got it right on first take. But how to make it sound even better? Check out these 5 tips to make your track stand out and sound like a professionally-made recording.
 Guitars: give more punch to your guitars by double recording your parts. This technique has become a standard method of recording. It’s pretty simple: you have to record every section of the song twice, trying to be as close as possible between the two takes, in order to achieve that slight human delay that makes dual-guitars bands sound so awesome. You can start by recording your first part along to the backing track. When you are happy with the result, pan the track hard left. Then proceed to record the second take by playing along the first one. Try to be as tight as possible. Pan the second take hard right and take a listen: instant wall of sound! If you are in a two-guitarists band, just record each side respectively, and remember to play as precise as possible.
Extra tip: lower your gain on distorted sound to gain clarity and punch. The tightness will make that sound “slam”. Nobody wants to hear a buzzy and noisy sound.
 Bass: Bass is sometimes recorded with a DI Box in order to get that clean signal that Sound engineers love. Alternatively, you can record it from your amp speaker. Whatever your decision is, be sure to record a clean signal. After recording your track, duplicate it in your project. Apply some amp simulation and overdrive to the second track, to get that gritty and raunchier sound. Now blend the clean and distorted part, and adjust the individual volume at your liking (raise the DI to get a more round sound, pump up the distorted to get a more focused sound).
Extra tip: You can go even further and compose a midi track with the same bass-line notes. Then proceed to assign a synth-bass sound and EQ out the highs: this will serve as your sub bass.
 Drums: to keep the punch without interfering with other instruments frequencies, you may use some compression. Compression makes louder things softer and soft things louder. On drums, this means you’re going to hear the body and punch of the drum but also lose some attack of the transient (i.e.: the sound of the stick hitting the drum head). The most easy approach would be to employ a fast attack and moderate-to-fast release. Ratio is very personal, so use your ears until it sounds good. Also, a clever use of the EQ may shape the sound as you want. Finally, use a noise gate to block out sound tails and room noises, resulting in a more cleaner and in-your-face sound.
Extra tips: to give new life to a boring snare sound, try to raise the pitch a few cents. Additionally, adding subtle reverb on some parts of the drums will provide more depth to the overall sound. Don’t reverb your kick too much to avoid that 80’s sound! (unless you want it that way 🙂 )
 Vocals: Record your vocals as clean as possible, and try to avoid unwanted noises such as popping, sibilance, feedbacks and external noises by using a MicScreen. Once you have a clean signal, the next step involves capturing all the nuances of your singer. Not an easy job, because the balance between too loud and too soft is quite hard to find: that’s where the compressor comes handy. Think about it like an invisible hand that adjusts the volume in real time. You will find out that it’s easier to compress and maximize the volume of a quieter track, instead of fixing a distorted and clipped sound, so start with a medium-to-low input volume. You will soon find that a combination of good mic placement, room acoustic and clean signal will provide half of the work for an exceptional vocal track.
Extra tips: If you don’t have a valve preamp, you can add tube saturation plugin on your track to make it sound more alive. Add some reverb and short delay to give depth to the sound.
 Overall mix: now you have to make that track loud: first step is a master EQ. Depending on the initial mix, lesser or drastic changes may be required. Key factors for the “body” and “smack” of the song are bass and lower mid frequencies. On the other side of the spectrum, upper harmonics will produce more clarity. Cut around 250 Hz to regain some clarity; boost around 1kHz to make the vocals shine. A slight touch of compression is needed when dealing with busy mixes. Finally, you may want to achieve some loudness: that’s what the Limiter plugin does. Basically you will push up the volume to the ceiling. Be aware of clipping and dynamics getting lost as you raise up the gain. Try to find a good balance.
Extra tip: Always try to monitor your project with appropriate desktop monitors, as headphones won’t translate the bass response as it should. Work with your ears, you will quickly understand the best settings for your music.
The final advice we can give to you is to get yourself the right tools for the job and squeeze the best out of it. Countless records were made with budget gear, and your recording career is just a few clicks away. Check out our Studio and Recording Equipment.


Comments 2