

Do you have an electronic drum set? If you’re also into recording and producing, you might have already recorded the audio signals of your sound module. Because the audio outputs on a sound module are line level, you probably used audio cables from there to your audio interface. This works of course, but by doing so, you are really missing out.
There are a lot of benefits in setting up your electronic drum set as a MIDI controller for your audio software. And it’s not too complicated, I promise!
Two major reasons for using an e-drum as a controller
- Much quicker, easier and deeper editing of takes than when recording the module’s audio output. That tom fill timing was a bit off or you missed the ride cup? No problem with MIDI editing. Also, quantizing MIDI offers more flexibility than quantizing audio.
- Access to a wider variety of software sounds: Virtual instruments like Superior Drummer 3 are often much better sounding and more realistic than the sounds built into electronic drum sound modules. And you can expand your sound palette with software synthesisers, drum machines and samples to boost your creativity.
-

- Toontrack Superior Drummer 3
-

- BFD BFD3
-

- Steven Slate Audio Steven Slate Drums 5
-

- Toontrack EZdrummer 3
👉 Go to the products 👈
MIDI is a convenient control protocol
In case you don’t know MIDI yet, it isn’t hard to understand. It is a simple and inexpensive control protocol. The most important thing to keep in mind is: MIDI does not transmit sound! When you press a key on a keyboard, MIDI submits a message in real time that contains information about which key number is being played (and how hard). A synth or any other MIDI-compatible system can interpret this message and generate a sound accordingly.
The pads of an electronic drum set use a different system to send information to the sound module. But from there onwards, it’s MIDI: A drum sound module sends out MIDI data and can also receive it vice versa. The data that you generate by playing the drums can be recorded as a MIDI track in a DAW program. You can then edit this information (if required) and send it back to the module in order to trigger its sounds.
Hardware needed to set up electronic drums as a controller
So how do you set up this system? Hardware-wise, it’s a walk in the park. You’ll either need an audio interface with MIDI ports or an external MIDI interface. USB Audio interfaces with MIDI can be found here, for example the PreSonus AudioBox 96 or the Tascam US-2x2HR. MIDI interfaces can be found here.
-
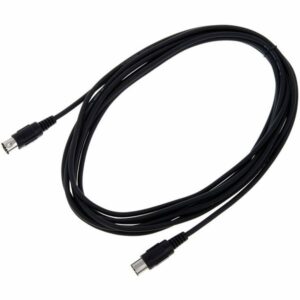
- MIDI Cable
-

- PreSonus AudioBox 96
-

- MIDI/USB Cable
-

- Tascam US-2x2HR
The simple ones look more like cables than boxy interfaces and are very inexpensive. The ESI Midimate EX is an interface trusted by many. You also need at least one MIDI cable. They don’t cost much. But keep in mind that the drums and the computer should not be set up too far apart, as the length of MIDI cables should never exceed 10 metres!
USB Audio Interfaces with MIDI
Thunderbolt Audio Interfaces with MIDI
Cabling
Patching is as follows: Connect the MIDI Out of your drum sound module with the MIDI In of your interface using a MIDI cable. That’s it! If you’d like to control and trigger the sound module from the computer, connect the interface’s MIDI Out and the module’s MIDI In, as well.

If your drum sound module doesn’t have a 5-pin MIDI port, simply connect it directly with your computer using an USB cable. On a Mac you then even don’t need an audio interface and this might also be the better solution if the audio interface of your computer is too slow.
Recording MIDI
Of course, you need to check a couple of things on your computer. While Windows systems usually need drivers for the hardware connected, you simply plug it in and it is ready to use on a Macintosh. In any case, you have to tell your DAW program you want to access the specific hardware and its MIDI ports. Depending on which program you use, you’ll find those MIDI settings somewhere in the main menu, labelled Preferences, Settings, Hardware Setup or similar. When choosing MIDI inputs, you might see there’s quite a variety (the list might also include software inputs and/or USB-MIDI-Inputs).
You are currently viewing a placeholder content from YouTube. To access the actual content, click the button below. Please note that doing so will share data with third-party providers.
Once you have set up the MIDI hardware, simply create a new MIDI track and set it to record mode. By default, almost all programs record all MIDI Inputs from anywhere, so you don’t have to worry about assigning inputs or anything. Once you are in record enable, you should see an input light or meter flickering when you play the drums. And when you start to record, regions/parts with data in it should appear.
Monitoring done right
In case you intend to record and edit MIDI in the DAW, but want your sound coming from the module itself, you need to set the correct output of your track. This is the physical output and the MIDI channel on which the software should transmit. Most drum modules run on channel 10 by default, as this is prioritised. If you use your drum module for sounds, be sure to switch off its Local Control. This decouples the internal connection between pads and sound generation. If you don’t do this, you might hear double triggers during recording.
You are currently viewing a placeholder content from YouTube. To access the actual content, click the button below. Please note that doing so will share data with third-party providers.
If you don’t use your module for creating sounds while recording, you have to make sure the MIDI data from that specific MIDI track’s output is sent to an internal sound source. In most programs, you can simply insert a virtual instrument there and route its audio output to the master bus and your speakers or headphones. In some programs, you need to connect it by hand or create a specific instrument track. In most cases, a MIDI track automatically transmits the MIDI sent to it („monitoring“).
Edit in any way you like
Once you have recorded your MIDI data, you can modify and edit it in any way you like. Small fixes and repairs can be done with one of the MIDI editors your software offers. You might already know this from working with instruments in your DAW. Quantise options let you perfect or even completely alter the groove. How hard a drum or cymbal is hit can also be changed („Note-On Velocity“). And, of course, you can skip the recording part altogether and program MIDI grooves right in your DAW.
Match pads to specific sounds – and even more!
When using „virtual drums“ as a plug-in inside your DAW, there might be a difference between your pads and the corresponding sound triggered in the software. While bass drum, snare, open and closed hi-hats usually follow a standard (called „GM map“), it is likely you want to address different sounds a virtual kit offers. For instance, a china crash cymbal instead of a normal one.
There are several ways to adjust this, depending on your specific sound module, DAW and plug-in. If the plug-in allows setting the MIDI Note Numbers for all sounds, this is one convenient possibility. Another would be to tell the drum sound module which MIDI Note Number to send from which pad. In a Roland TD-07, you press „Kit Edit“ and navigate to „MIDI Note“, where you can set them for all pads individually.
-

- Roland TD-07
-

- Ableton Live
-

- Jomox Alpha Base
Some DAWs allow for advanced mapping or transforming of MIDI data, for example in special MIDI drum editors or via real-time transformers (like you would find in Apple Logic’s Environment). A very convenient way is the „MIDI learn“ option some programs offer. In Ableton Live, you just press Cmd-M, click the function or pad you want to assign and give the system a corresponding MIDI message, like a stroke on a pad. There you have it!
This is also a very convenient way of controlling other functions via MIDI. For example, you can control playback and record with pad strokes, start whole loops or even mute, solo or control various other parameters of the DAW, your sound plug-in or even effects! A convenient way for live e-drummers is to change sound sets by striking a specific pad – via MIDI Program Change. You can also use MIDI to skip the computer and control hardware sound modules (like the Jomox Alpha Base) directly! There is a lot to try and discover, so don’t wait and explore!
Are you already recording your drum parts with an electronic kit and a samples library? Let us know with a comment!


Comments 0
No comments yet.