

You have successfully wrote the most amazing songs in modern history and want to climb the charts… or you simply want to have a proof of your level to show to the venue manager to score a gig. In those cases, you definitely need a good sounding Demo-Tape. Many bands failed in this attempt because they underestimated the importance of creating a good sounding and convincing demo. To save you from failure, we present you the 10 most important tips for creating a good product!
1. All killer, no filler!
Your demo should sound amazing from start to end and you have to pack the best songs you have, leaving the “not-so-wonderful” tunes out. You will have time to release your back catalogue during your career but for now you have to leave a mark. Ask your family and friends which song is the best and write down the choices: the songs with most votes are, obviously, the most catchy and trending, the lucky horses you have to bet on. Try to already think about the best arrangement, hook and bridge and imagine the end product in order to maximize the potential of your songs. Does that double solo annoy people off? Cut it. Does your singer feel uncomfortable singing in that range? Change the key of the song.
2. Deadlines!
Even if it doesn’t sound funny and creative at all, you have to set yourself deadlines and organize your work. Sure, it’s nice to lock yourself in a old mansion for months trying to write a masterpiece, but you still ain’t no Led Zeppelin so… you need to finish your work as soon as possibile and avoid to waste too much time on details. As mentioned before, full blown details and inaudible details can be pinpointed later on, during the recording of your official album: for now you have to impress someone with a good and direct sounding tape that shows your capabilities and artistic skills more than the arrangements small details. Remember: an amazing composed song recorded badly won’t impress as much as a simpler and more straightforward rendition of it recorded with good results and decent mastering. (for gig scouting and record deal scoring ONLY! We won’t ever say that a polished generic song is always better than a raw rock’n’roll tune 😉 )
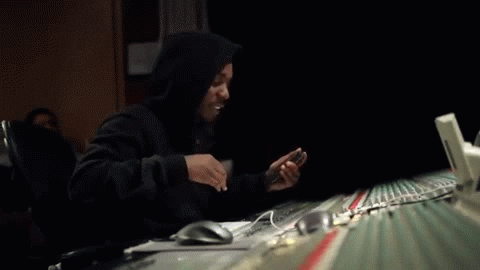
3. Recording = Relax?
Now that you’ve set your mind straight to the point, it’s time to begin the fun part: recording! While being the best experience during the creation of your demo tape, you have to keep in mind a few details in order to avoid bad results: start by getting ahold of the best equipment you can. Your instrument must be fully setup, tuned and with fresh strings/drum heads. Take the right time to familiarize with the various devices you are going to use, such as amplifiers, preamps, audio interfaces and so on. Make several tests before hitting the record button and have some fun! Remember that a good record is composed of both accuracy (timing and playing in pitch) and groove (having fun and not sounding too stiff). Enjoy!

4. Take the time to edit
Before mixing your tracks take the right time to do one of the most boring tasks in music production: editing. This involves removing noises, glitches, unwanted hiss but also quantizing the drum parts, checking that everything is on the grid and fix wrong parts (if you’re in a rush and you have two similar parts in the song, you can just copy-paste the right take on the wrong one). Performance errors and mistakes are generally not accepted on any kind of recording, given the amount of technology and helpful tools available today.
5. (Don’t) fix it in the mix
If everything went as planned, it’s now time to mix! The rough mix involves setting the levels, deleting unused parts, choosing the pan of the instruments and the overall balance. Once you’re done with this, you can start to shape and sculpt your sound with EQ, compressors and other effects. Keep the final touches like reverbs and modulations at the very end. Your song is starting to get a facelift and sound polished, fresh and clean. Crucial: aim for a clean and balanced mix – there’s no use for busy and over saturated mixes, every instrument must be clearly audible. No cheats for mistakes coverups, go back to the practice room kid!
6. Mastering @ Home
Once you are satisfied with your mix, you should take some time to master your songs. Since you are aiming at being noticed, don’t waste too much time on dynamics and just raise the overall mix loudness in order to let every instrument be heard at any listening volume. Put a little bit of compression, some frequencies imaging and a touch of equalizer to let your song shine and push hard on the speaker. More about the Mastering topic can be found HERE.
7. Tell a story – and be convincing
To really catch the listener’s attention, you have to choose your songs wisely. They have to be emotionally performed, with lots of dynamics and , obviously, perfectly performed. You really have to feel the “soul” of the band through the song, no matter what the message is. You can talk about puppies or vegan black metal or anything else you want as long as you do it in a funny, emotional, unique and/or captivating way.
8. The form is art
Next is the visual part of your demo: the cover, booklet, band photo and whatever else you decide to throw in the package. Remember to keep the same style throughout the various parts of your record. Find an amazing photo (or create your own composition) for the cover art and follow the “mood” for the booklet, rear image and band photo as well. The key point is to capture the attention so try to think outside the box. Last but not least: try to be as professional as you can, high resolution photos and quality stuff. Nobody wants to see your selfies cropped in a single photo.

9. Time to pack up a press package
Now it’s time to prepare the press package to send to various Radio Stations, Labels or Distributors. Pack your album (in MP3 format), a PDF with relevant informations (short bio, band members, social media URL), lyrics and some press photos ready to use and zip everything. You can host your package on popular website such as MediaFire or Dropbox and share the link – works much better than attaching files to emails, which is simply not possible if we talk about an entire Mp3 album. To avoid being rejected or just simply put in the “forgettable bands” tray, try to reach the right person with a taste that will match the one of your music.
10. Release Party!
And it’s over! After the fatigues and troubles you’ve encountered during the process, it’s time to finally celebrate an accomplished mission! Set up a release party and stream the whole album through the PA or do a small gig to present the songs – either way invite all your friends, partners, collaborators and enjoy the night. You deserve it!

What was your experience recording your first demo tape?
Do you have any experience to share? 🙂


Comments 1